How to Add a Closet Office (Cloffice) to Your Home in 5 Easy Steps
Sep 9, 2024 / Liset Marquez
When Taya Schnell needed a dedicated work space at her home, she decided to add an office to a spare closet. The “cloffice” is still serving her well months later.
“To me, it felt like the best use of square footage,” she said.
Mikki Austin, on the other hand, helped her her teenage son find a quiet spot for schoolwork when she added a desk to a closet in the family’s guest bedroom.
Both women say they were able to build their closet offices over a single weekend. And they are willing to share their tips so you can add a closed office in your home.
1. Empty Out Your Closet

Of course, the first step in repurposing a closet as a tiny room is to clear out the space and measure it to make sure it will offer enough space.
“Whatever I wasn’t using would go in the closet,” Austin said. “I would recommend everyone get a storage unit because stuff just gathers around your house and it clutters your brain and your house.”
Make sure to visit our size guide to find the best storage unit to hold your belongings and make more space at home just like Austin was able to do!
2. Remove Closet Doors and Reconfigure
Once you have an empty space to work with, you can decide whether to remove or leave the doors and existing shelves. Our two home decorators opted to remove the doors to make tier cloffices feel more spacious.
You can also take more detailed measurements to decide what desk options will fit.
Schnell decided she wanted to keep the original closet shelf in case the family ever sold their home and could easily convert it back to a closet.
“I’m always thinking about resell value,” she said. “Not everyone will want a cloffice.”
3. Install Electrical and Light Options

Since many closets are not equipped with electrical outlets or optimal lighting, Austin began by identifying the closest outlet (you need to plug in a computer after all).
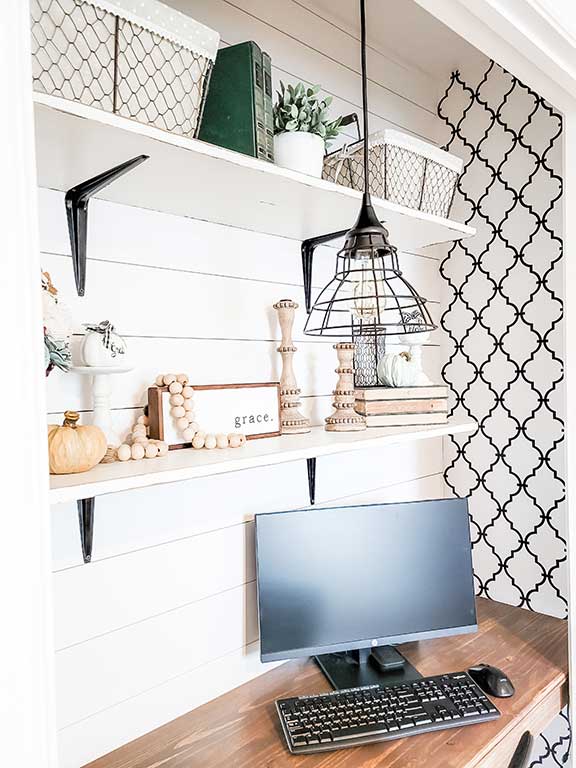
Luckily for her, there was an outlet just outside the closet. Her husband installed a plug-in wire-framed pendant and was able to hide the cording behind the door frame.
To reduce cord clutter, Austin used the outlet on the side of the cloffice to connect a power strip which she then placed inside to connect all of the devices including the pendant light.
Avoid cord clutter by hiding it behind a basket, just like Austin was able to do.
“That was one of the biggest challenges: Deciding how to run power inside the closet,” she said. “I’m not a fan of cord clutter.”
For additional lighting, she added a battery-operated light to the bottom shelf.
Schnell was able to bring in an electrician to have an outlet added inside the closet. This allowed her to easily connect all the computer equipment inside and not have to worry about any electrical wiring.
4. Add Paint and Wallpaper to Cloffice

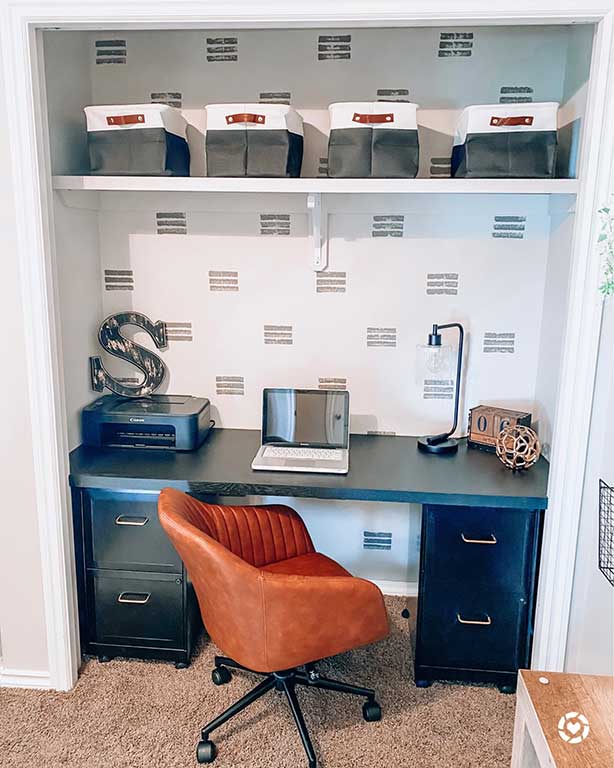
Schnell used a taupe paint as an accent color to the black and white theme of her cloffice. Using the side of a sponge as her brush, Schnell dipped it in the paint and created a freehand design on the back wall. Pro-tip: Schnell used a level to make sure the lines weren’t crooked.
“I didn’t want it to be a blank wall, but I was trying to find an inexpensive way to decorate it,” she said.
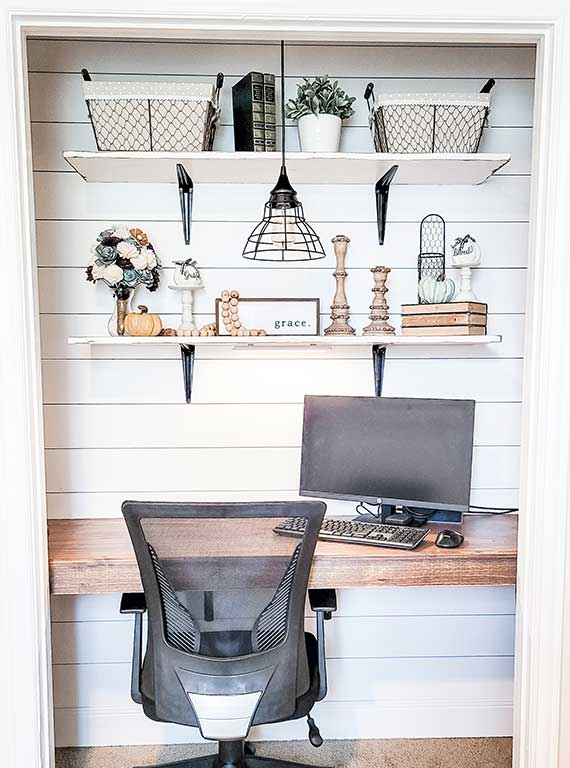
Austin, who was going for a boho farmhouse look, added wallpaper on the side walls of her closet and shiplap on the back wall.
To create the shiplap, she and her husband opted to buy 1-inch thick plywood that was already primed and was then cut the length of the wall. Installing the shiplap took the couple two full days. The hardest part was ensuring each board was straight and evenly spaced out.
The easiest part, she said, was putting up the black and white wall paper on the side walls.
5. Install Cloffice Shelves and Desk

For the desk, Schnell went with a medium-density fibreboard which she painted black and screwed on top of two filing cabinets, which she purchased on Amazon for $150 each.
“You can never have enough storage,” Schnell said.
She added three baskets on the shelf to store random items. In all, Schnell spent about $400 creating her closet office.
Austin said she spent about $275 on her design. Both the desk and three shelves were made using plywood which she stained in a light wood finish. Once she finished the shelves, Austin realized she didn’t like the color and opted to paint them white.
The shelves are held up by L brackets she bought at the home improvement store and spray painted black. For an added finish, she painted the screws gold.
As for the décor, all the items on the shelves were things she already had at home.
Add Space at Home with a Cloffice
By moving desks into closets, both Schnell and Austin say they gained more space in the rest of their homes and even decluttered and spruced up the guest rooms where their cloffices are located.
Schnell said that her kids have had a sleepover in the guest room and they use it regularly for reading.
“It’s been one of the most practical things we’ve done in our house,” she said.
Austin said the space around her son’s new closet desk is so organized, she thinks it improved her son’s productivity with his school work. Her husband, who works from home, also uses the space even though they have another office in the home.
“We use it every day and we never came into this room before unless someone was coming to stay,” she said.
If these closet office tips inspired you, read on to learn how these creative moms built and organized chic study spaces for distance learning.
If you’re looking to refresh your work from home space, then learn how to paint furniture with this step-by-step guide of a desk makeover.
Two home repair experts shared 5 home DIY projectsthat even most novice handypersons can do.


